


我的荣耀 开启荣耀之旅


 Disagree Terms
 Log out


HONOR Camera Tips & Tricks // PRO Mode


 Last reply :
Dear HONOR fans,
I hope you are all enjoying the holiday so far, with your HONOR devices ofcourse ;)
Today we are going to take a look at the PRO Camera feature of your HONOR smartphone.
I know a lot of you are very active and interested in photography, so that’s wat we are going to talk about in this article.
PRO MODE
The first step is to put your Camera into Pro Mode.
Camera > More > PRO
Alright, here you can see multiple settings that you can adjust.
All the way on the left you have an Icon that stands for the metering mode.
You can choose between;
- Matrix (Recommended for broad landscapes)
- Center (when the subject is in the center of the scene and stands out from the backgroud)
- Spot (when the subject to be highlighted in the picture is relatively small).
The next step is ISO.
the term ISO refers to the image sensor's sensitivity to light.
For daytime pictures the recommended ISO is between 100 and 200.
In Low-Light conditions use an ISO value above the 400 mark.
If you want to shoot indoors, round 400 will do the job.
Ofcourse these settings really depend on the light conditions.
The next step is Shutter Speed, the “S”.
Shutter speed is a measurement of the time the shutter is open, shown in seconds or fractions of a second
For static scenes the recommended shutter speed is between 1/80 and 1/125; use a higher speed when trying to capture moving subjects.
If you want to shoot the stars for example, make sure to open the shutter for like 15-30 seconds.
For the best results also use a tripod when photographing dynamic scenes.
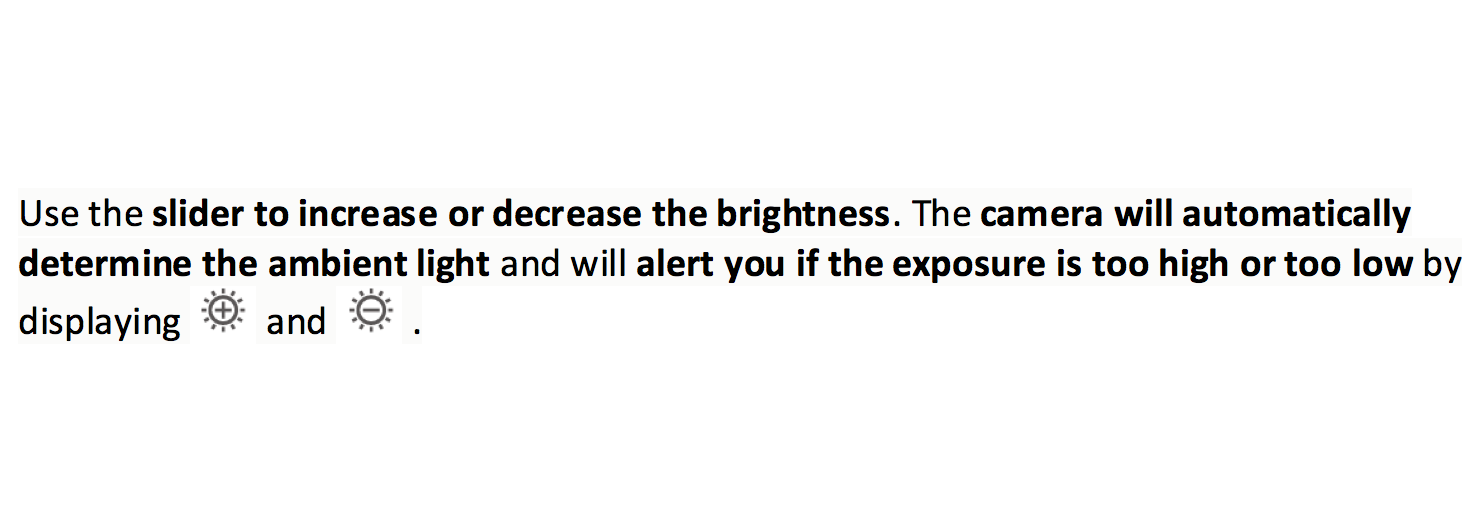
EV Settings
EV stands for “Exposure Value”. It’s a number that represents a combination of the shutter speed and aperture setting, such that all combinations that yield the same exposure have the same EV (for any fixed scene luminance).
Next up: AF Settings
AF stands for Auto Focus.
In the AF Settings you can choose between;
- AF-S mode (Short for Auto Focus Single, recommended for static scenes)
- AF-C mode (Short for Auto Focus Continuous, recommended for moving scenes)
- MF mode (Manual Focus, to manually adjust the focus on a specific object)
The last PRO feature are the AWB settings
AWB stands for Auto White Balance.
As you can see you can slide to change to different weather conditions.
If you select AWB it will obviously choose the best settings for the right weather conditions automatically.
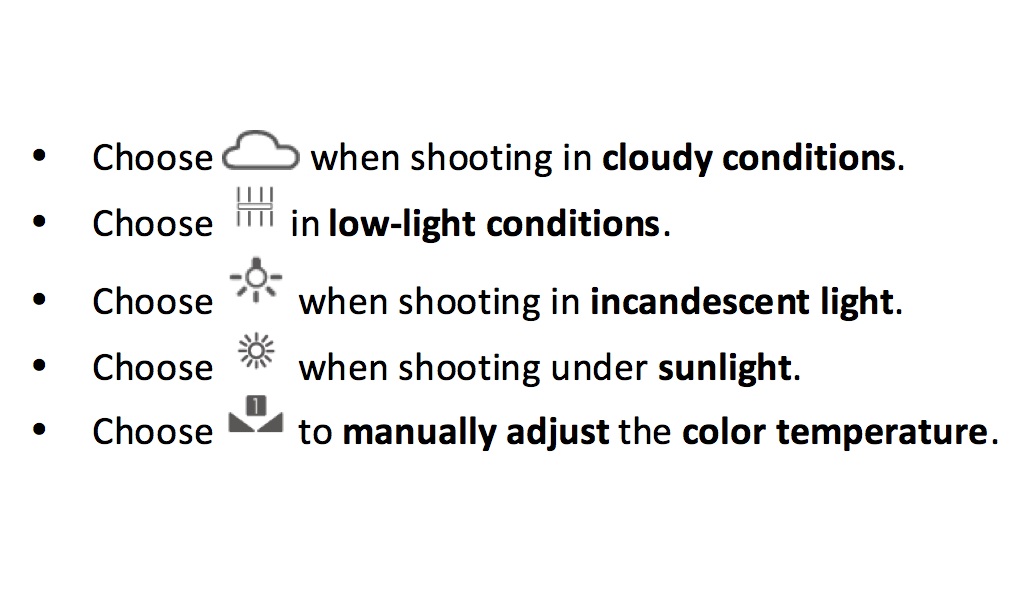
· Set a higher K value if you want your pictures to have a cozy, nostalgic tone; a lower K value gives your photos a cold, calm or futuristic tone.
Bonus
If you want to make your photos as horizontal as possible, please check out the Horizontal level.
Press the settings button in the upper right corner and enable “Horizontal level”.
After this feature is enabled, two horizontal guidelines will appear in the view finder. When the dotted line overlaps the solid one, the camera is horizontally aligned.


- Posts
- Following
- Followers
- Energy
-

Revolt
-
+ Follow

-
- 131 Posts
- 23 Following
- 252 Followers
- 8524 Energy


- Posts
- photo
- video

Dear HONOR fans,
I hope you are all enjoying the holiday so far, with your HONOR devices ofcourse ;)
Today we are going to take a look at the PRO Camera feature of your HONOR smartphone.
I know a lot of you are very active and interested in photography, so that’s wat we are going to talk about in this article.
PRO MODE
The first step is to put your Camera into Pro Mode.
Camera > More > PRO
Alright, here you can see multiple settings that you can adjust.
All the way on the left you have an Icon that stands for the metering mode.
You can choose between;
- Matrix (Recommended for broad landscapes)
- Center (when the subject is in the center of the scene and stands out from the backgroud)
- Spot (when the subject to be highlighted in the picture is relatively small).
The next step is ISO.
the term ISO refers to the image sensor's sensitivity to light.
For daytime pictures the recommended ISO is between 100 and 200.
In Low-Light conditions use an ISO value above the 400 mark.
If you want to shoot indoors, round 400 will do the job.
Ofcourse these settings really depend on the light conditions.
The next step is Shutter Speed, the “S”.
Shutter speed is a measurement of the time the shutter is open, shown in seconds or fractions of a second
For static scenes the recommended shutter speed is between 1/80 and 1/125; use a higher speed when trying to capture moving subjects.
If you want to shoot the stars for example, make sure to open the shutter for like 15-30 seconds.
For the best results also use a tripod when photographing dynamic scenes.
EV Settings
EV stands for “Exposure Value”. It’s a number that represents a combination of the shutter speed and aperture setting, such that all combinations that yield the same exposure have the same EV (for any fixed scene luminance).
Next up: AF Settings
AF stands for Auto Focus.
In the AF Settings you can choose between;
- AF-S mode (Short for Auto Focus Single, recommended for static scenes)
- AF-C mode (Short for Auto Focus Continuous, recommended for moving scenes)
- MF mode (Manual Focus, to manually adjust the focus on a specific object)
The last PRO feature are the AWB settings
AWB stands for Auto White Balance.
As you can see you can slide to change to different weather conditions.
If you select AWB it will obviously choose the best settings for the right weather conditions automatically.
· Set a higher K value if you want your pictures to have a cozy, nostalgic tone; a lower K value gives your photos a cold, calm or futuristic tone.
Bonus
If you want to make your photos as horizontal as possible, please check out the Horizontal level.
Press the settings button in the upper right corner and enable “Horizontal level”.
After this feature is enabled, two horizontal guidelines will appear in the view finder. When the dotted line overlaps the solid one, the camera is horizontally aligned.