 More Products
 Compare


ABOUT HONOR
Events












我的荣耀 开启荣耀之旅
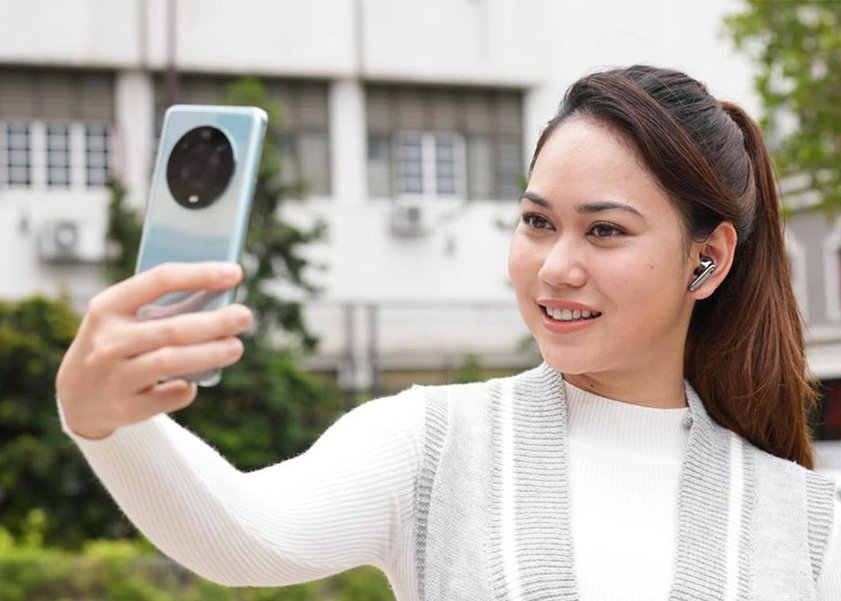
How to Take a Good Selfie with Your Phone: Master the Art
Snapping the perfect selfie is easier than you think. It's all about catching the right light, finding your best angle, and, of course, smiling at just the right moment. But here's the thing: it's not just about you. Your phone plays a big part, too. With the right camera features, every shot can be frame-worthy. Ready to find out how to make every selfie your best one yet?
By the end of this read, you'll master the steps of how to take a good selfie and learn the value of the right gear. From lighting to angles and backgrounds, we'll boost your selfie skills. Plus, get tips on editing and choosing the best camera phone for standout selfies. Let's dive into the 2024 selfie guide, turning every snap into a masterpiece.
Steps to Take a Good Selfie with Your Phone
Taking a good selfie involves more than just a click. It's about understanding the interplay of light, angles, and background, coupled with wise editing. Follow these steps on how to take the best selfie, and you'll be on your way to capturing selfies that not only look professional but also authentically you.
Find the Light
Lighting can make or break your selfie. The golden rule? Natural light is your best friend, so aim to take selfies during the day when you can utilize sunlight. The best light is during golden hour—just after sunrise or before sunset.
Position yourself so that the light falls onto your face, brightening your features without casting harsh shadows. Avoid backlighting unless you're going for a silhouette effect. A well-lit selfie not only brings out your best features but also minimizes the need for heavy editing.
Understand the Angles
Finding your best angle is key to a flattering selfie. Here are some tricks to help you do that:
• Universal Flattering Angle: A top tip is to lean into a top-down perspective. Positioning yourself from above and tilting your camera down can really make a difference. This angle, ideally at 45 degrees, has a magical way of being universally flattering.
• Tilt Your Phone: A slight tilt of your phone can change the game. You can tilt it up, down, to the side, or keep it steady and just tilt your head. Straight-on shots are rarely the most flattering, so don't be afraid to play around until you find what works best for you.
• Focus on the Eyes: The eyes are where it's at. They're the soul's windows and can draw people into your photo. When you're taking a selfie, make it a point to look directly into the camera lens—not just at the phone screen. If you're not sure where to look, do a few test shots to find out where your eyes meet the camera most effectively.
Choose the Background Carefully
Your background can add context and interest to your selfie, or it can distract from your face. Look for simple, uncluttered backgrounds that complement your look without overpowering it. Natural settings, textured walls, or even a plain backdrop can make your selfie stand out.
The typical car selfie or the mirror shot in your lobby might feel all too familiar. While you don't need an extravagant scene behind you, adding some intrigue to your background can transform your selfie. Be it a park, your cozy corner at home, or even amidst the aisles of a grocery store, a dash of creativity in choosing your backdrop can work wonders.
Edit Wisely
Editing is the final touch in the art of selfie-taking, but less is often more. Use editing apps to enhance your selfie subtly:
• Adjust the brightness, contrast, and saturation to make your photo pop.
• Use filters judiciously. A light touch can enhance the mood but overdoing it can look unnatural.
• Remove blemishes carefully but try to keep your selfie looking like the real you.
Editing should enhance your natural beauty, not mask it. Aim for edits that look so natural, no one can tell you've made them.
What Makes a Good Camera Phone for Selfie?
Good camera phones for selfies transcend basic functionality, integrating several key features that enhance image quality, user experience, and the overall outcome of the selfie. Here are the essential features that make a camera phone great for selfies:
High Resolution Front Camera
A high-resolution front camera is pivotal for capturing selfies with crisp details and vivid colors. Look for a camera with a high megapixel count (at least 12 MP). The higher the megapixels, the more detail your camera can capture, leading to sharper images.
In the context of selfies, this sharpness allows for capturing fine facial details - from the texture of your skin to the sparkle in your eyes. For example, devices like the HONOR 90 come equipped with a 50MP Selfie Camera, offering unparalleled clarity and depth, ensuring that every selfie reflects the true essence of the moment.
Wide Angle Lens
A wide-angle front camera lens is a game-changer for selfies, especially when you want to include more background or a group of friends. It allows you to capture a broader view without having to stretch your arm too far or use a selfie stick. A lens with a wide field of view of 100°, like the HONOR Magic4 Pro, provides the flexibility to include more surroundings without distorting your facial features and ensures no one gets left out of the frame of group selfies.
Balanced Photo Exposure
Balanced exposure is critical for ensuring your selfies have the right amount of light, making your photos look natural and true to life. Look for a phone that automatically adjusts the exposure to adapt to various lighting conditions, from bright outdoor environments to dimly lit rooms. Some phones offer HDR (High Dynamic Range) capabilities in their front cameras, which can help balance the shadows and highlights of your selfie for a more even and pleasing result.
Sharp Autofocus
Autofocus on the front camera helps keep your selfies sharp and focused, even if you're moving slightly. A fast and accurate autofocus system ensures that your face is always in clear focus, highlighting your best features. Some phones also feature auto face detection, which optimizes focus and exposure for the face, ensuring you always look your best.
Great Battery life
While not directly related to camera quality, great battery life means you can take selfies throughout the day without worrying about your phone dying on you. A battery capacity of 4000mAh or higher is recommended for avid selfie takers and content creators who rely on their phones to capture and share moments throughout the day. The HONOR Magic5 Pro, with its 5100mAh battery, is an excellent example, capable of lasting a full day even with extensive selfie-taking sessions.
Conclusion
Mastering how to take a good selfie involves more than just a smile and a click. It's about understanding the interplay of light, finding your most flattering angles, and selecting an appealing background. Moreover, understanding what makes a camera phone excellently suited for selfies — from a high-resolution front camera and wide-angle lens to balanced exposure and reliable autofocus — empowers you to make informed choices about your mobile device. With the right approach and tools, you can turn ordinary self-portraits into captivating expressions of your unique self. So, embrace these tips, find your best angle, and let the world see you through your lens — one selfie at a time.
FAQ
How can I make my selfies less blurry?
To achieve clearer selfies, ensure your camera lens is clean and use a steady hand or a tripod to minimize shaking. Most smartphones also offer a portrait mode or autofocus feature that sharpens the subject effectively. Additionally, tapping on your screen where you want the camera to focus can help prevent blurriness.
Is the back camera better for selfies?
While the back camera of a smartphone typically offers higher resolution and better image quality compared to the front camera, taking selfies with the back camera can be difficult due to the lack of a viewfinder for framing. Modern smartphones have significantly improved front cameras, making them convenient and sufficiently capable for high-quality selfies.
Which pose is best for selfie?
There isn't a one-size-fits-all answer, as the best pose depends on personal preference and what you feel most comfortable with. However, tilting your head slightly to one side, finding your "good side," and experimenting with different angles can help you discover the most flattering pose. Remember, confidence shines through, so choose a pose that makes you feel good.
What is the most flattering selfie angle?
The most flattering selfie angle is usually a top-down 45-degree angle. Holding your camera a bit higher than your eye level and angling it down towards your face can help elongate your neck, slim the appearance of your face, and reduce the prominence of the under-chin area. This angle also allows you to play with different facial expressions and poses to find what looks best.
Source: HONOR Club
Products Recommend