More Products
 Compare





Events















我的荣耀 开启荣耀之旅

How to Set Up Voicemail Android: A Complete Guide
Table of Contents
How do I set up voicemail on an Android phone?
For users searching “How do I set up voicemail on an Android phone?”, the process begins in the Phone app and uses the network's mailbox service.
● Open the Phone app and select Keypad.
● Press and hold 1 to call voicemail, then follow the prompts to create a PIN.
● Choose the default greeting or record a personal message.
When setting up voicemail on Android, keep the PIN private and avoid obvious combinations such as 1234.
This is the standard method for how to set up voicemail on an Android phone. If holding 1 fails, open Phone > Settings > Voicemail and confirm the mailbox number.
How do I activate voicemail on Android?
Voicemail on Android is normally activated by the mobile network. People searching “How do you set up voicemail on an Android phone?” usually need to call the mailbox and complete its prompts.
Press and hold 1, create a PIN and greeting, then call your number from another phone to confirm that unanswered calls reach voicemail.
If calls disconnect or keep ringing, ask the network provider to activate voicemail or check call-diversion settings.
How do I set up a voicemail greeting on Android?
The process for how to set up a voicemail message on Android starts by calling voicemail and selecting the greeting or personal-options menu.
Enter the PIN, record the greeting, review it and save it as directed.
Keep the message brief and avoid sensitive details. For example: “Hello, you've reached Alex. Please leave your name, number and a message.”
You can use the default network greeting or return later to replace your recording.
How do I set or change my voicemail PIN on Android?
Set or change the PIN through the voicemail service rather than the main Android settings.
Call voicemail, enter the current PIN and open the security or personal-options menu. Some providers also offer PIN controls online or in their app.
Avoid phone numbers, birth dates and repeated digits. If the PIN is forgotten, contact the network before repeated attempts lock the mailbox.
Where is voicemail on my Android phone?
Voicemail on an Android phone is usually available through the Phone app, although its location depends on the software and network.
Common access points include:
● Press and hold 1 on the Phone keypad.
● Open the Voicemail tab or tap a voicemail notification.
● Open Phone > Settings > Voicemail to check mailbox settings.
Because it is mainly a network service, instructions on how to set up voicemail on Android and the available controls can vary between phones.
How do I access voicemail on my Android phone?
Access messages by holding 1, tapping a notification or selecting a message in the Phone app.
Enter the PIN if requested, then follow the spoken menu to play, save or delete messages.
From another phone, dial your mobile number, interrupt the greeting with the provider's access key and enter the PIN.
How do I set up Visual Voicemail on Android?
Enable Visual Voicemail in a supported Phone or voicemail app when the network and handset offer the feature.
It displays messages in a list so you can choose which ones to play, save or delete.
To enable it:
1. Open the Phone app and select the Voicemail tab.
2. Choose Set up, Enable or Visual Voicemail and enter the mailbox PIN.
3. Ask someone to leave a test message.
If the option is missing, confirm network and handset support and enable mobile data. Standard voicemail should still work by calling the mailbox.
How do I get voicemail notifications on Android?
Enable Phone notifications so new voicemail alerts can appear.
Open Settings > Notifications > App notifications > Phone, then allow notifications. Depending on your Android version, you may also need to enable notifications under Voicemail or Visual Voicemail. Make sure Do Not Disturb is not silencing them.
For a stuck alert, listen to every new message, restart the phone or clear the Phone app cache.
Ask the provider to refresh voicemail notifications if the problem continues.
How do I set up voicemail on a Samsung phone?
● Open Phone > Keypad, hold 1 and follow the network prompts for the PIN and greeting.
● Check the mailbox number under Phone > Settings > Voicemail.
A Voicemail tab may provide Visual Voicemail when supported by the provider and model.
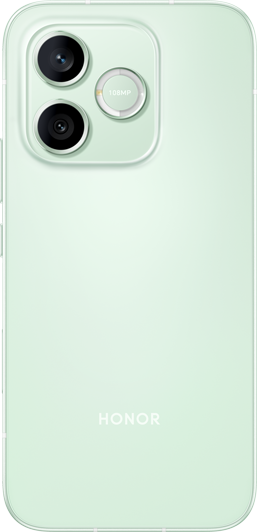
For more help choosing an Android device, you can compare current smartphone options available in the UK.
Why can’ t I set up voicemail on Android?
Setup can fail when voicemail is inactive, the mailbox number or call forwarding is incorrect, or the phone has a weak connection.
Confirm that ordinary calls work, Airplane mode is off and the correct SIM is selected, then restart the phone and try again.
Other common causes include:
● The account or tariff does not include voicemail.
● The mailbox is full or the saved voicemail number is incorrect.
● A recent SIM, number or network change has not finished updating.
Contact the provider if the problem continues; it can confirm activation, correct diversion settings and reset the service.
How do I turn voicemail back on on Android?
● Restore voicemail by asking the network to reactivate the mailbox or correct call-diversion settings.
● Check Phone > Settings > Calling accounts, Call forwarding or Voicemail, then test the mailbox from another phone.
● Do not change forwarding codes unless the provider supplies the correct instructions.
After reactivation, make a test call to confirm that the greeting and mailbox work.
How do I reset voicemail on Android?
A basic reset changes the PIN or greeting; a full mailbox reset must be completed by the provider.
Call voicemail to update personal options or delete old messages if the mailbox is full.
Before requesting a full reset, confirm whether saved messages, greetings and settings will be deleted.
Resetting the Phone app does not usually reset the network mailbox.
Is voicemail available on Android phones?
Voicemail is available on most Android phones, but the mobile network controls the service.
Standard voicemail is widely supported, while Visual Voicemail depends on the handset, SIM, account and software version.
Check with the provider if activation is required or if separate SIM lines need individual mailbox settings.
Source: HONOR Club
Products Recommend